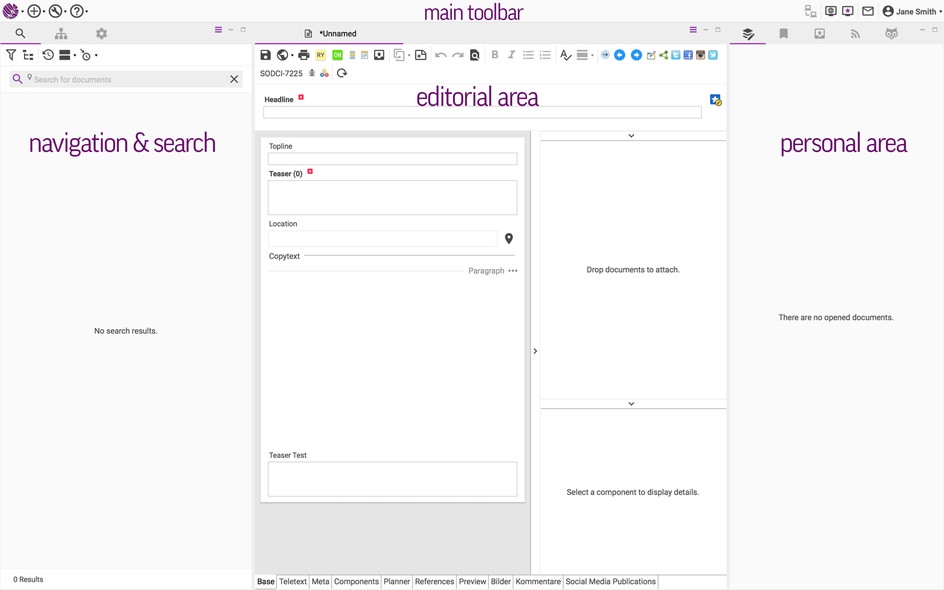
Generally, Sophora’s user interface is subdivided into three areas. The first one is called Navigation & Search and is located on the left. The second area in the middle of the DeskClient’s view is the Editorial Area. Here, users can edit different document types. The Personal Area as the last one is located on the right. Above all areas you can find the Main Toolbar. In the following all areas including their functionalities will be explained in detail.
Main Toolbar
Sophora’s Main Toolbar includes all important key functions. On the left, you find the Sophora menu , as well as the menus New Document , Tools
![]() and Help
and Help . All personal settings are located on the right site of the toolbar. The personal toolbar includes among others the user menu
and the Messages [messages] button. Also, the network connection status is located here
. When you hover the cursor over an icon, a tooltip is displayed which gives you further information.

Categories [categories]
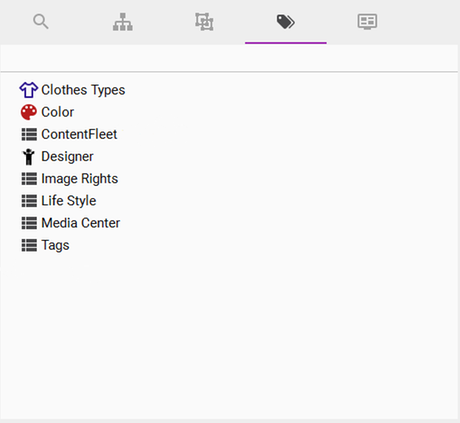
Use categories in order to classify documents or to be able to search for documents belonging to specific categories. By using the view called Categories
you can manage all available categories. Just open a category by double clicking. If the view Categories
is not displayed yet, you can open it via the menu User
>> Views >> Other >> Categories
.
Enhanced Categories
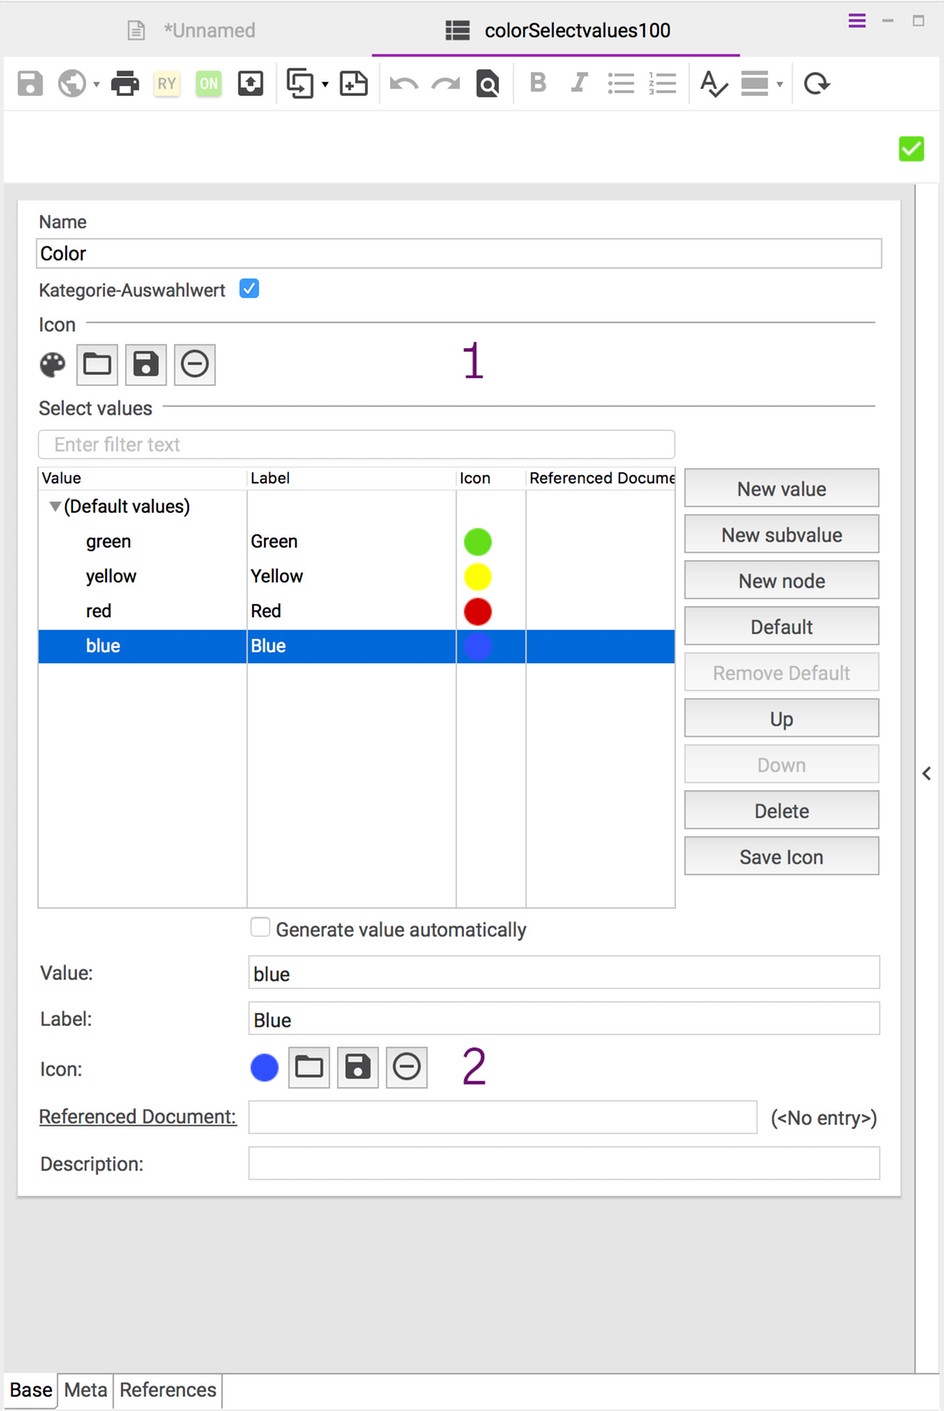
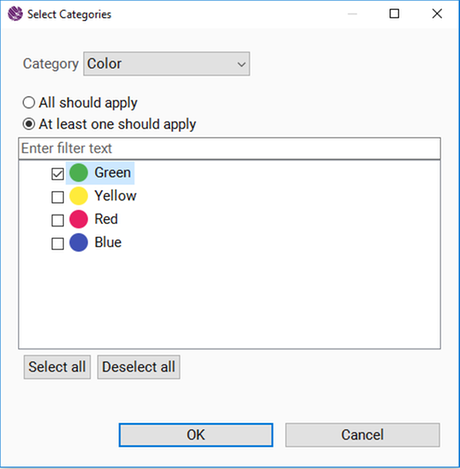
The icon of an Enhanced Category is the icon of the category document (as shown in Screenshot 1). Also, individual values of a category can be marked with icons ( as shown in Screenshot 2).
All values of an Enhanced Category are listed in a table. In order to edit a category entry, just click in the table on the value you want to edit. Below the table you can make changes. If you do not want to specify a particular value for an entry, select the checkbox Generate value automatically.
Note that Value is the internal representation whereas Label is the name that is displayed.
In this dialog you can also specify an icon for an entry (only images with a resolution of 16 x 16 pixels are valid).
After defining Enhanced Categories, you can find these in Sophora’s search. Open the search view and click on the category icon. Afterwards, select the category, for example color, to start searching for it. If the category has Enhanced Categories, a dialogue will be opened with all belonging values. In the dialogue you can select the values you want to search for.
Editorial Area
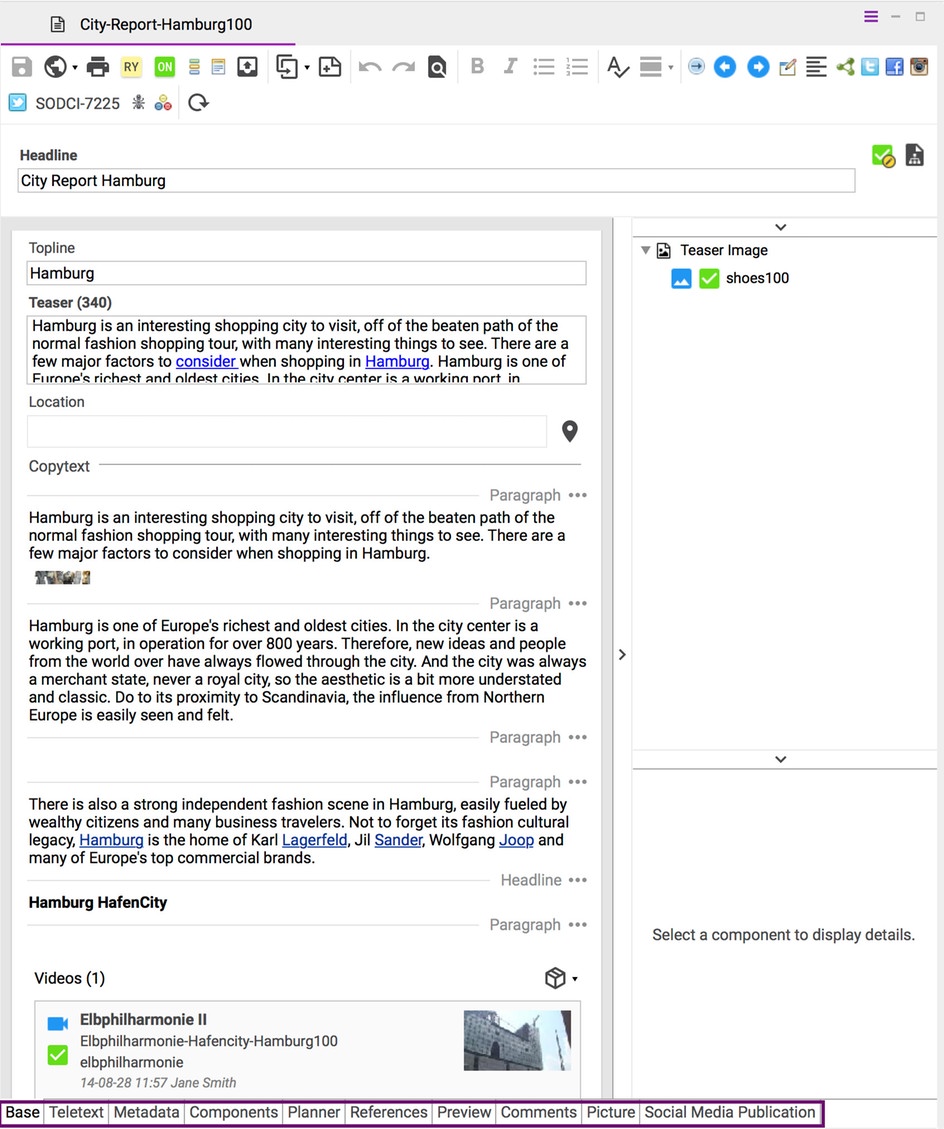
The Editorial Area is Sophora’s area of work. If not configured differently, almost every document that is opened in this editor comes along with the following tabs: Base, Metadata, Components, References and Preview. Index documents are including mostly the planner tab. In addition more tabs can be configured like teletext, comments, pictur, etc. The tabs are located at the end of the document.
Base
Basic document information are deposited here.
Metadata
On this tab the according metadata is displayed.
Components
All documents attached to the document or referenced by it are shown on this tab.
References
In case of further use of this document, you can see it here.
Preview
The preview displays all latest changes of the document – including your (unpublished) modifications. You can easily open this view by the shortcut Ctrl + Shift + P or via the toolbar’s preview button. The preview can also be dragged out of the DeskClient, for example to a second monitor.
Planner
Time scheduling for the document’s components can be configured here. By using this function, you can determine when and how long components should be visible in the context of the document.
Component Structure
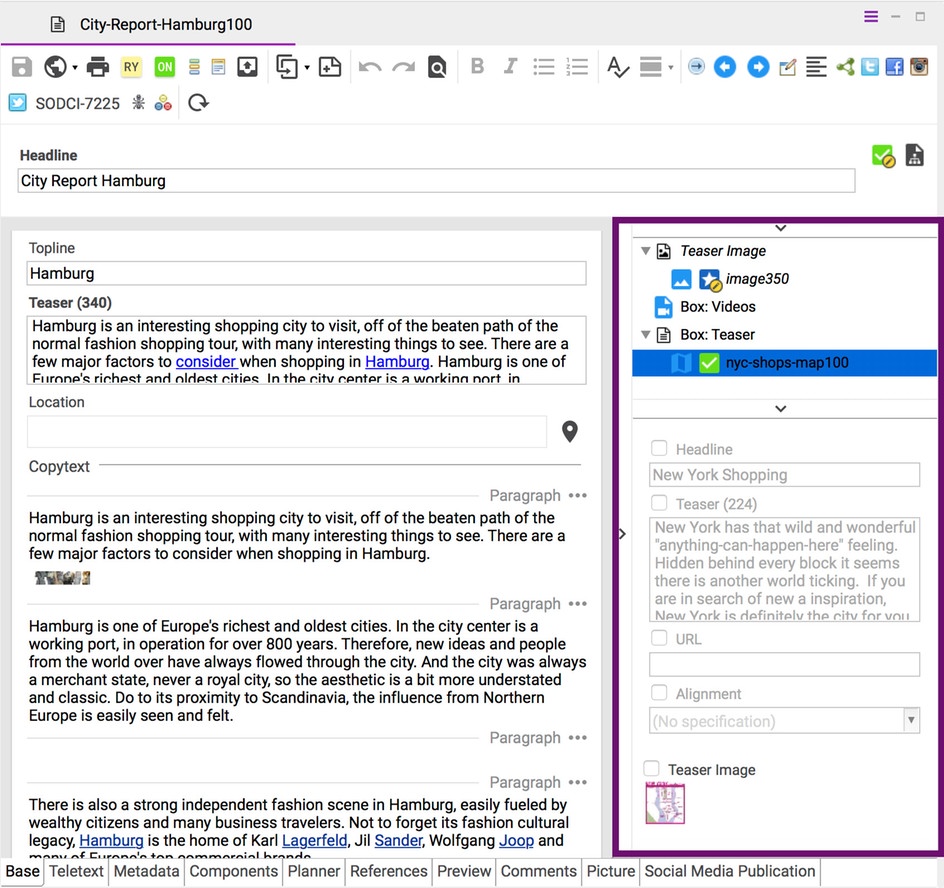
All elements of a document (= components) which are assigned to it are shown in the component structure, for instance images, teaser or boxes. Open the Components tab or the Base tab to have a look at the components structure. On the Base tab you have the opportunity to hide or open up the components structure.
Personal Area
This area includes all personalized functions. Here, you are able to choose the views you want to work with. In the following some of these functions will be explained in detail:
Open Documents ![]()
You can find all currently opened documents here.
Recent Documents ![]()
All recently opened documents are listed here.
Preview
Use this view to see the preview for the document (not published yet) you are working on.
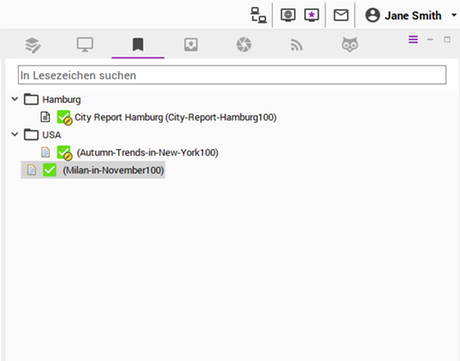
Bookmarks
You can create and use personal or common bookmarks, for instance in order to regain frequently used documents.
Proposals
With proposals you can optimize the workflow of editors among themselves. Use proposals to assign documents or to recommend documents to other editors.
Lightbox
By using Sophora’s Lightbox you can create a collection of images. Add images to your Lightbox via drag & drop or by clicking on the Lightbox icon in the editor toolbar.
Feeds
Use this view to easily search, read and import content from internal or external sources. Feed Manager quickly converts content from any XML-feed into documents.
Search Agents
Search Agents automatically execute searches in the background and notify you of new documents found.
Views
You can change the position of all views as you like - even outside of the DeskClient. Just drag the tab of a view to the desired position while keeping the left mouse button pressed. Before you drop the view, the new position will be shown.
In order to reopen a closed view, you need to go to User Menu >> Views. All views can be restored there. If you want to integrate a view in Sophora again, just drag the tab of the view back in the DeskClient’s window.
Window Layouts
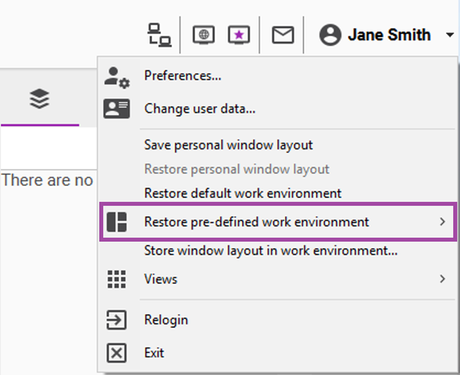
The window layout can be freely modified and saved if needed. Once the views have been arranged as you like them, this ordering can be saved as a personal window layout using User >> Save personal window layout within the main menu.
In order to switch back to the last saved layout use User >> Restore personal window layout. You can also switch back to the default window layout at any time using User
>> Restore default window layout.
Via User >> Restore pre-defined work environment you get back to your default window layout which is designed for your user role.
