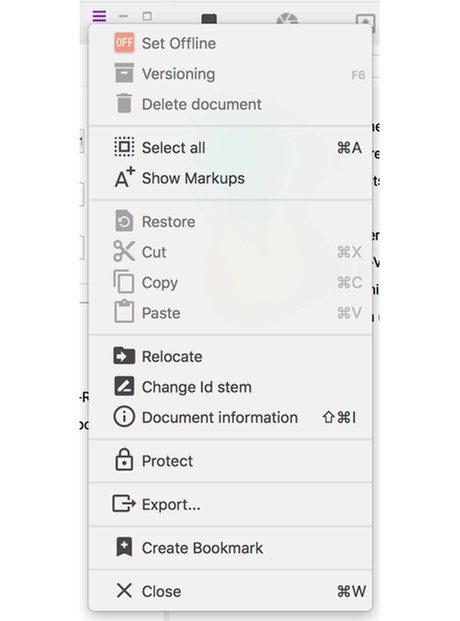
The text editor of documents containing a copytext field usually is located on the base tab. You can carry out all important tasks with the aid of the editor toolbar (see purple marking in the illustration); please also mind the ![]() menu on its right side which provides additional actions. You can learn about editing documents in general here.
menu on its right side which provides additional actions. You can learn about editing documents in general here.
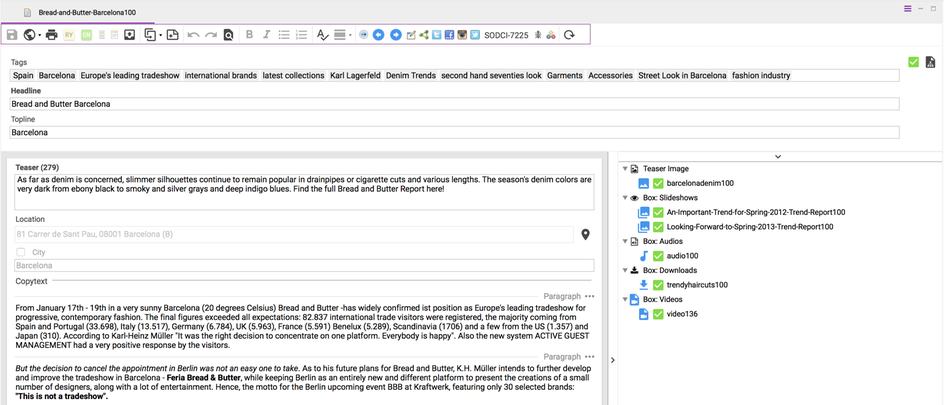
Editing Text
It is possible to copy text from Word or other programs into the text editor. Text formatting will be maintained.
Hit Enter to create a new paragraph. Above each paragraph besides the separator line, you can see the paragraph's type, for example Paragraph. If you click with the left mouse button on the three dots next to the paragraph type, you can select a different type out of those available. Thus, you can format a paragraph as headline or table dead easy.

If you want to format text as a list or in italics. you can do that by using the corresponding toolbar buttons or shortcuts.
Paragraph Types
Since they are configurable, different paragraph styles my exist. Here are some examples:
- Paragraph - A standard paragraph. If HTML tags are inserted here, they will appear on the website character by character.
- Headline - A subheading.
- HTML - Insert HMTL code here. The creation and edition of HTML paragraphs is limited by a permission.
- Table - To copy or create tables, change the paragraph style to Table. You can add rows and columns by using the right mouse button.
Text Clean-Up
In the text editor's context menu, you'll find the Clean up function. It automatically replaces certain characters throughout a previously marked text segment or, if no such section is marked, in the whole document. Which characters are replaced by others can be configured by Sophora administrators. This function is designed to facilitate an uniform usage of (special) characters: e.g. replacing every dash with a minus (depending on the configuration).
Note, that by default (i.e. without additional configuration) multiple space characters are automatically replaced by a single space character.
Pasting Content
Within the copytext editor, you can paste text from the clipboard in different ways. Use Paste Content in the context menu and select your requested paste option:
- Paste: The text will be pasted with all formatting (you can also do this by using the shortcut Ctrl + V or the toolbar button)
- Paste Unformatted: Pastes the text without any further formatting
- Paste Raw Content: Pastes the text omitting formatting like bold or lists, but maintaining indentations or breaks.
Spell Checking
Sophora DeskClient provides spell checking. The spell check is available in the text editor, as well as in other text fields. Dictionaries, which will be used by the spell checker, can be uploaded and modified by administrators (refer to this article).
The spell checking function is adaptive. Therefore, you can add new terms to the underlying dictionary. For this purpose, right-click on a word which is faulted by the spell check and select Add ... to dictionary or Ignore ... always. These settings will apply globally, i.e. for all other documents, and will survive a restart.
If the dictionary contains an entry similar to a word which is faulted by the spell check, you will receive suggestions in the context menu, to which you may change the word.
Removing an entry from the dictionary is also possible via the context menu.
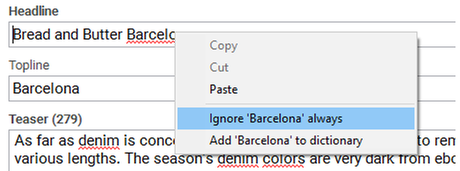
You can enable and disable the spell checking with the corresponding toolbar icon; if it is enabled, the button will be pushed in. Words which are faulted by the spell check will be underlined red.
Linking Text
If you want to link a certain word or phrase with another already existing document, mark the phrase and drag the desired document from the search results, proposal section or similar views onto the phrase. You may also copy a document using Ctrl + C or the context menu. Mark the text phrase afterwards, open the context menu and select Paste document link.
If you have been successful, the phrase now should be blue and underlined; the linked document's tooltip appears while you mouse over the phrase. If you want to open the linked document, double-click on the link, or right-click on it and select Open link document from the context menu.
If a phrase shall link to an external website, mark the phrase, open the context menu and select Create link. Enter an url in the emerging dialog; this will create a new link document.
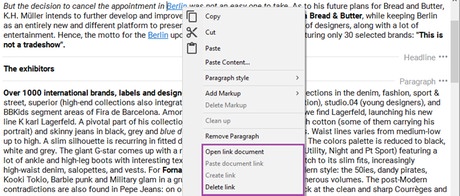
If you wish to remove a link again, just right-click on the link and select Delete link. This will not delete the linked document.
Creating Anchors
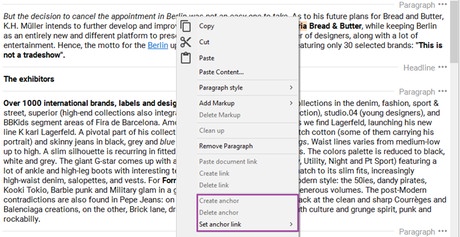
A selected text can be declared as an anchor. To do so, open the context menu by right clicking within the copytext while text is selected. Now choose the menu entry Create anchor.
A dialog will appear where you have to define a name for the new anchor. Subsequently, confirm the dialog by clicking OK. The selected text is now an anchor and will be color-coded. A tooltip will brief you about the anchors name; you can remove the anchor again by using the entry in the context menu.
Creating Anchor Links
If you have already defined anchors, you can now point to them. To do so, select the text on which you would like to create the anchor link and open the context menu. Now choose the anchor for the new anchor link in the submenu Set anchor link.
Semantic Markups
There are three different types of semantic markups available: Languages, Abbreviations and Quotes. Among other things, these markups can be used for a barrier-free web presence. The available languages can be configured by administrators. Markup will be highlighted in the copytext. The actual color also can be customised by an administrator for the entire system.
By default, languages have an orange, abbreviations a purple and quotes a green background color. The visibility of markups can be switched on and off by using the button Show markups from the menu More Actions ![]() within the editor toolbar. This setting applies to all opened editors.
within the editor toolbar. This setting applies to all opened editors.
If you move the mouse cursor over a markup, a tooltip appears. Here you can find further information about the markup.
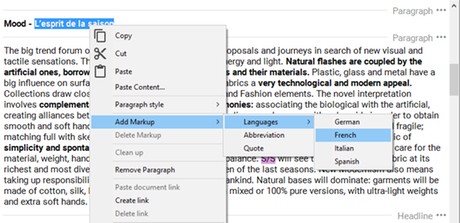
Creating a Markup
Follow the steps below to create a markup:
- Select the text to mark within the copytext
- Right-click to open the context menu
- Select the desired markup type in the submenu Add Markup
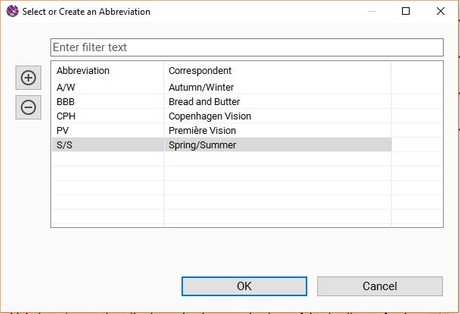
Creating an Abbreviation Markup
To create an abbreviation markup, pick an abbreviation from the emerging dialog. If a corresponding abbreviation already exists, it is pre-selected in the dialog. Otherwise you will have to enter the abbreviation's equivalent in the table. Changes you make in this dialog are saved automatically for further usage and will be available at the next markup creation.
With the buttons located on the left side, you can add or delete abbreviations. The list of abbreviations can be filtered by entering a filter text. To edit an abbreviation, just select the appropriate table cell. Abbreviations can either be selected with a doubleclick, the "Enter" key or the OK-button. All changes taken by you in the abbreviation dialog do not only apply to your workspace but are available throughout the whole system.
Creating Nested Markups
If you need to tag a certain text snippet with different markups, for instance if a foreign language section contains an abbreviation, you can nest them. The overlapping area of the two markups is then indicated by a different background color. However, it is not possible to nest markups of the same type. This prevents, for example, that an abbreviation markup can be created within another abbreviation markup.
Removing Markups
Use the following steps to remove a markup:
- Select the text area containing the markup you would like to remove
- Right-click to open the context menu
- In the submenu Delete Markup, select the type of markup you want to remove. By selecting All Markups, you can remove all markups at a single blow if there are more than one.
Adding and Positioning Images
If you wish to add an image to a paragraph, you can simply drag an image document from the search view, the component structure or similar views into the desired paragraph.
You can move paragraph images between paragraphs using drag and drop at any time if you like to change their positioning afterwards. Doubleclicking on a paragraph image will open the corresponding image document.
Changing an Image's Format
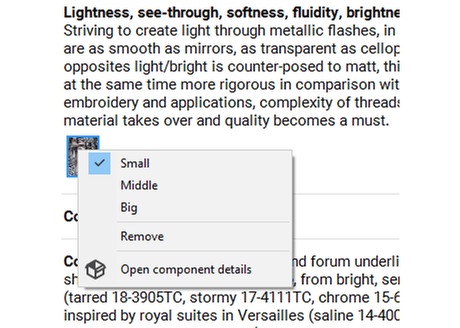
You may change the format of paragraph images. For this purpose, right-click on the image and select an image variant. The currently selected variant is color-coded. Which image variants you will have at choice can be configured by administrators.
Placing Groups in Text
You can insert document groups into the copytext. For instance, if you wish to place a teaser group directly into the text, right-click in the paragraph and select New Subgroup >> Paragraph Box >> Teaser.
Subsequently, you can search the desired document and drag and drop it into the new box. It is possible to configure which document types can be added to paragraph boxes.

You can also create groups by dragging one or more documents from the search (or similar) view into a paragraph. If necessary, you will be asked which type of group should be created. Subsequently, the document(s) will be added to a newly created group.
Furthermore, it is possible to relocate groups from one paragraph to another by using drag and drop. Therefore, simply drag the group into the desired paragraph (press and hold the left mouse button).
Protection of the Text Editor
The text editor's content can be protected via the entries of the context menu. If the editor is protected, a corresponding hint will be shown and neither the text nor paragraph images and boxes can be edited.
If you want to learn more about protecting fields and documents, please see here.