Requirements
To enable SEO Check's Google Search Console features, you first need to create a project in Google Cloud Platform. Your administrator may have already created a project for your website.
You also need a property in Google Search Console.
Enabling Google Search Console API
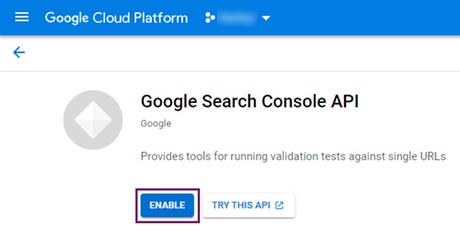
In the Google Cloud Platform Console, navigate to your project. Search for Google Search Console API, and select it from the results:

If the Google Search Console API is not activated for your project, click Enable to activate it.
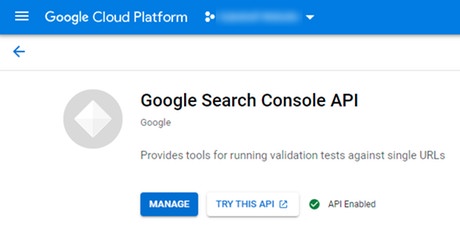
If the Google Search Console API is activated for your project, it should look like this:
Creating a Service Account and a JSON Key
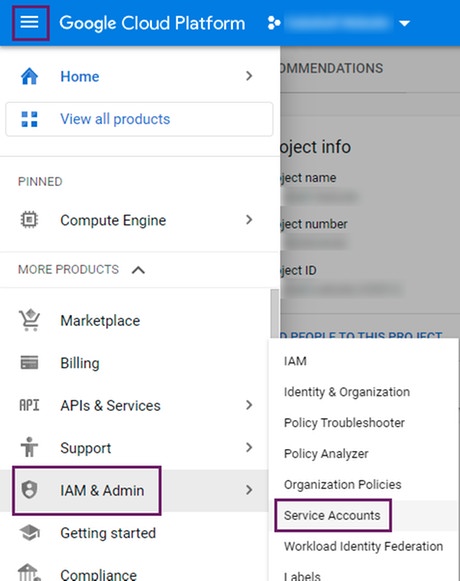
From the main menu, select IAM & Admin, then Service Accounts:
To create a new service account, click Create Service Account. Enter the required information.

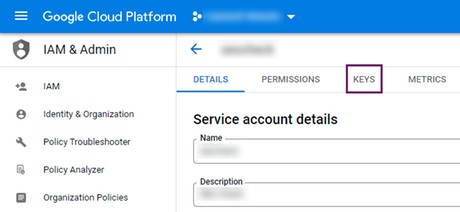
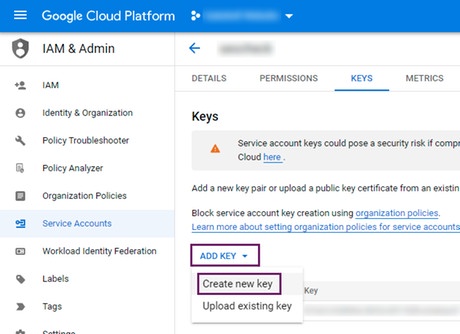
Open the newly-created service account, then select the Keys page:
To create a new JSON key, click Add Key, then select Create new key:
Select the JSON key type, then click Create to create the key:
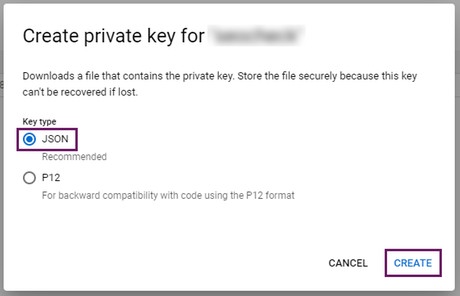
When you click Create, a JSON file containing the private key information will be downloaded to your device.
Adding JSON Key to SEO Check Configuration
Place the JSON key file in a directory accessible to the SEO Check application.
In the configuration file for SEO Check, enter the Google Search Console property name and the path to the JSON key file.
sc-domain: prefix is required for "domain" properties in Google Search Console.seo-check:
google:
# Settings for the Search Console API.
search-console:
property-names:
# The web site's property name in Google Search Console.
'[example.com]': sc-domain:example.com
# File system path to a JSON key file for a service account that can access the Google Cloud project.
service-account-key-file: /path/to/key-123456-1234567890ab.json