Maps can be used to create interactive stories or to illustrate content on interactive maps. Places of interest, travel routes, and historic sites are examples for working with interactive maps. The add-on provides the following features:
- Use maps as common Sophora documents
- Choose clipping and level of detail for a map
- Mark points, lines or areas on a map and add descriptions to these elements
- Based on Microsoft's Bing Maps, OpenStreetMap or Mapbox
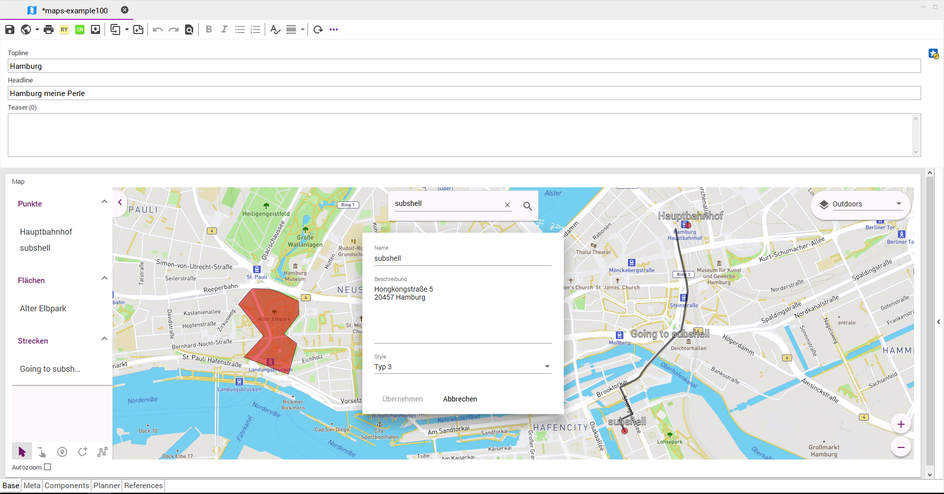
Different Map Views
The different view options of the maps add-on depend on the used maps provider (Bing Maps, OpenStreetMap, Mapbox) and the supported options. Mapbox for example supports different views like day, night, satellite, dark and bright views. It is possible to switch between the different views in the drop-down menu on the right.
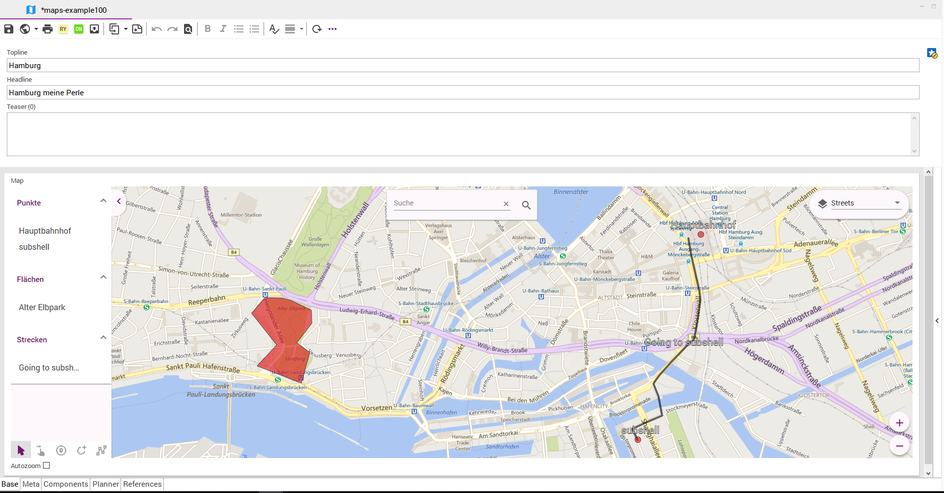
Search Locations
- Type a location into the input field "Search".
- By pressing the enter key or clicking on the magnifier icon
the search will be run immediately and the result will be shown.
- A toast shows up at the bottom of the maps where you can decide to accept the result or not.
- By accepting the search result a marker pin will be saved.
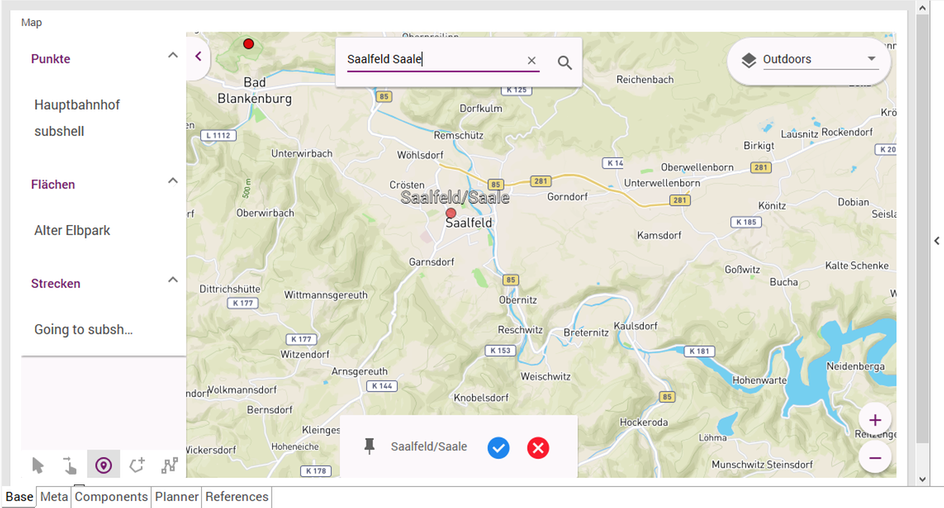
Integrating Maps in Documents
In addition to set up a separate document type "maps", it is possible to integrate the maps field in any existing document types like "article", "image". The default case is to configure a point maps field in the concerning document type. In this case you can attach geographic coordinates to a document. Following steps have to be taken, if the editor would like to attach a maps point to the document:
- Open the document in which you want to add a location.
- Click on the Maps icon right next to Location. The preset location will be opened.
- Enter the place you want to add under Find location and press the enter key.
- A placemark will be set. You can change the placemark if required.
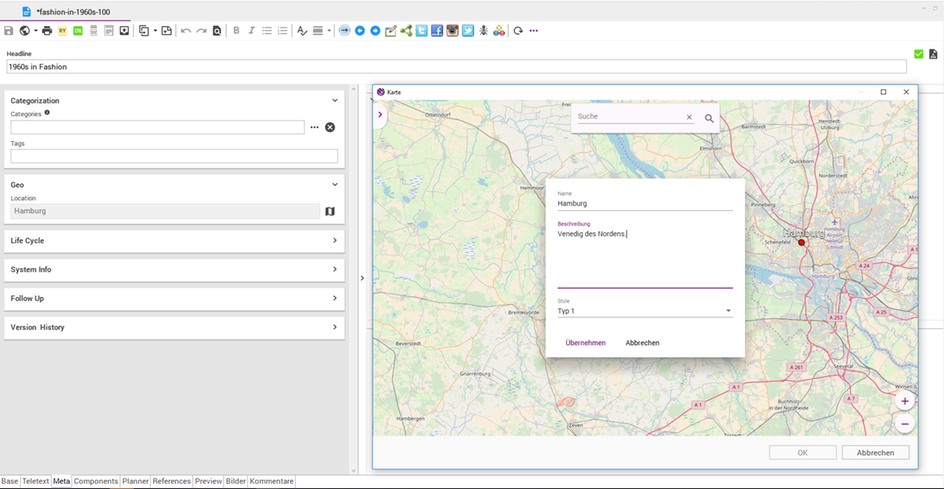
Edit Tools
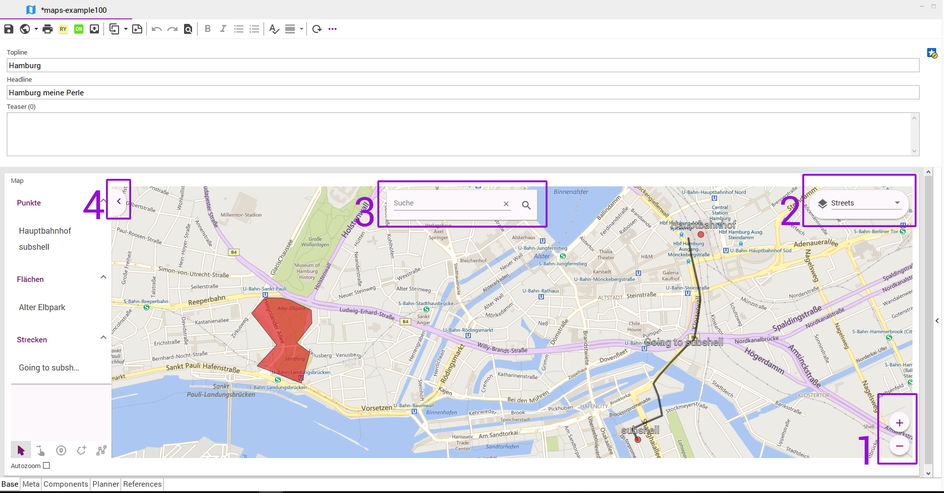
Maps allows the user to navigate (1) through the map or to set multiple locations (3), areas (4) or lines (5) in any level of details. Afterwards it's possible to select an element and to edit it (2).
General Controls
The technical basis is a graphical map. You can navigate through the map by holding the left mouse button and dragging the mouse pointer, while the pointer is located over the map.
Zooming (no.1) in and out can be accomplished by using the mouse wheel or by clicking on the "+/-"-buttons.
The top right drop-down menu can be used to switch between different views (no.2) like satellite (Aerial), map view (Road) or night view (Inverted). The selection depends on the configured map provider.
With the maps input field "search" (no.3) on the map it is possible to search for a location. Type a location into the input field and press enter or the magnifier icon for confirmation. The "x" will delete your current search.
On the left hand of the map you'll find the editing toolbar, which you can hide by clicking on the arrow on the top left (no.4).
Map Field
This input field is displayed as a single line for coordinates. The map button on the right hand side opens a dialog with a graphical map. You can search for a city, a country or any other location by using the search field on the top of the map. The result will be displayed on the map. To select the searched location approve it by clicking the green confirmation button of the toast below - a marker pin will be shown pointing to that location. After confirming the dialog, the chosen location will be set in the editor toolbar on the left hand.
Using Elements
The map field allows the user to set different kinds of elements (points, lines or shapes) and can be set with a left click. To choose an action or element, the editor toolbar on the left-hand side offers several modes. These elements are described below:
- Navigate through the map (see navigation below)
- Select and edit points, lines or shapes
- Create a new point
- Create a new line
- Create a new shape (area)
By creating a new element or selecting an existing element a detail dialog will be opened. In this dialog a title, a description and a type can be assigned to every element. This can be achieved by clicking on the corresponding element on the map or in the editor toolbar. Title and description are displayed to give further information about a marked location. The type (1, 2 or 3) can be used to display elements in different ways, e.g. with different colours or different pin icons. This only takes effect when rendering the map on the website.
In the select and edit mode, it is possible to delete a pin, add an intersection of a line or a shape-point by double-clicking on the selected point.
Pins
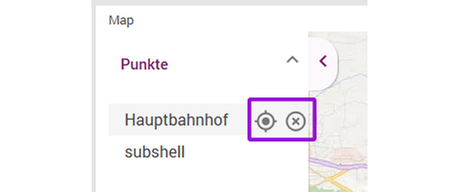
Pins mark a single spot on a map. They can be added by clicking with the left mouse button on the designated location on the map or by searching for a location and approving the search result. To delete a point on a map, select the point from the list of the editor toolbar on the left-hand side and then click on the delete icon. If you can't locate a point from the list on the map, you could automatically go to it by clicking on the localize icon.
Lines
Lines mark straight segments between two or more points. Multiple points can be added by left-clicking on intersections. To finish a line, double-click at the destination point.
- Select the line icon from the editor toolbar on the left.
- Afterwards, set the points of the line and approve it by double-clicking on the destination spot. Add as many intersections as you like.
Shapes
Shapes (or areas) can be used to mark regions. Basically, shapes are handled like lines, but their inside is filled with colour. It is comparable to creating a polygon figure with a common graphics software.
- Select the shape icon from the editor toolbar on the left.
- Add as many corner points as you like by left-clicking on the desired spots. To finish a shape, double-click at the destination point.
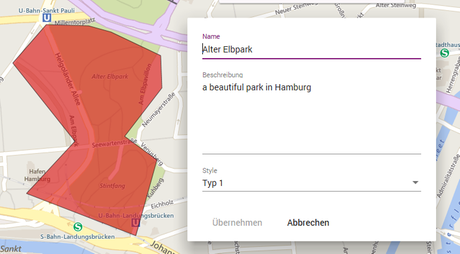
During the creation of a shapes, it is possible to navigate through the map by holding the left mouse button and dragging the mouse pointer to the desired direction. Every other operation (like assigning a title and a description or deleting a line) is similar to working with pins or elements in general.