How we Improved our Workflow at subshell
O-Neko is a software that runs within Kubernetes and which makes it possible to deploy and review development states of software based on Docker images in the cluster.

With this article, we would like to introduce you to a new project, which was developed by us - Team Weasel - during a series of Lab-Days over the last 1,5 years. A tl;dr of the article is at the end.
Monday morning, December 18th, 2017 at half past 11. Like every other week, shortly before the start of the sprint, we met in the team to review the past sprint, to discuss positive and negative aspects of the sprint and to consider possibilities for improvement.
At that time, we worked very hard on many new features and improvements for Sophora Web. In order to make our work as smooth as possible, we used a separate development branch in the code for each task.
Although this approach has become a de-facto standard in the industry, it was not common practice for us until a few months earlier and its consistent implementation was therefore new for all project participants. And while branches made the work easier for us developers, at the time, they caused frustration among our testers and project managers.
The reason for their frustration was the inadequacy of our static test infrastructure, in which we had a test server for every major version that has been further developed as well as for the upcoming version.
Each test server consisted of Sophora servers, a demo playout and most of our tools, including Sophora Web. We released Sophora 2.5 only a few weeks earlier, so we had test servers for versions 2.5, 2.4, 2.3 and the next version 3.0.
The development status of our software, which is automatically installed on the test servers, is determined by the main code base of each project. Development statuses for features that are developed on our own branches are not installed on any test server.
This is not at all a problem for us developers who have a development environment set up on our own computer, as each development stage can be compiled and started in no time at all.
But if a project manager wants to preview how a feature already works or what the UI of a development looks like, she has to hope for the goodwill and presentation talent of a developer or try to set up her own development environment.
This then developed into a discussion between developers and project managers. We, as developers, of course didn't want to forego using branches that make us more productive. And project managers didn't want to forego seeing features on the test servers as quickly as possible, independently of us, so they could work more productively. Therefore, the productivity of some was prioritized over the productivity of others.
Admittedly, after some time, the frustration was also noticeable at subshell, so we started looking for solutions to the problem during our retrospectives. The bar was set high because we needed to find a solution that everyone would be happy with. It was clear that neither we developers nor the project managers would want to change their minds, because each group had plausible arguments for their point of view.
The inspiration for the idea of how we could solve the problem came, by chance, from one of our customers. In order to be able to test further developments on his website (which was also being developed on branches), a small homemade program was used, which provided the playout to all branches with the help of Docker containers on a server.
For this to work, a conglomerate of different tools is necessary. Since the containers run exclusively on a single dedicated machine, it is as intensely equipped with memory and processing power as there are muscles in an average gym.
Not all the details of the processes will be explained here. But this solution included a homemade, pure web interface, which made it possible to both make rudimentary settings at the playout (productive or test system, etc.) and to stop the containers if necessary. It should be noted, however, that this program is very specific to its website and therefore cannot be easily used for other projects such as Sophora Web.
If one wanted an analogous solution, one would have to set up a corresponding project individually. That sounded like a viable solution. With purposeful recklessness and convinced naivety, we approached the project management team during the next retrospective and explained our idea of creating an application based on this model. It would run the software versions from the development branches so that everyone would have access to the branches at all times.
The idea was well received, except for one small detail. We couldn't plan for this because development was costly, and we had already many projects that had to be completed during a certain timeframe.
Meanwhile, we had a slight lack of understanding. How could we solve a problem without wasting time? Fortunately, our inventiveness and pragmatism were not quite spent, and we found loophole that we could use to our advantage in this situation.
At subshell, we are allowed to use one day per person and per sprint as a so-called lab day (or 8 hours spread over the whole sprint) to work on projects that are not regularly on the project plan, but serve, for example, to develop skills, to integrate wish functionalities into our software or to evaluate new technologies in connection with Sophora.
We at Team Weasel quickly agreed that we wanted to implement our own branch playout as a lab day project in order to achieve almost the same goal, as if the project had been regularly scheduled for the sprints.
Looking back, the declaration of our idea as a lab day project even had many advantages. No one could tell us what and how we should do develop the technology, what it could do and what it should look like and be called.
This sudden freedom was directly reflected in our first decision, in which we decided what our new pet would be called.
Phew. Morning of January 2, 2018 at 11:30. Retrospective again. The first of the new year and after the big holiday on Monday, therefore, it was scheduled for a Tuesday. Now that we had a rough idea and also knew that we could do the project according to our own specifications, it quickly became clear to us what the concrete goals should be. We needed something like our model system, only different. Bigger, better, more flexible. More professional, more modern and "cloud native", as well as independent and not dependent on the mood of a system build that we didn't have under control.
In line with the trend project Kubernetes, which was flourishing then (as it still is, 1.5 years later), we set ourselves the goal of creating a flexible application with an arbitrary development stage of a software which could be started in a Kubernetes cluster.
We began by creating a log, where we would record a rough specification of our goals:
This all seemed manageable, although it came with a very steep learning curve. Not all of our team members were familiar with Kubernetes and then only from the user's point of view. None of us knew how to administer and set up a cluster, and the only way to get the motivation to acquire the necessary expertise was by giving the impression that it would pave the way for an enhanced developer experience.
At this point, I had to admit that I still don't enjoy repairing the frequent failures of the cluster. One could not run such a cluster productively, if the actual paid task of the responsible persons is "development" and not "administration" and one can dedicate only a fraction of one's time to the maintenance of Kubernetes.
The last part of the New Year's Retrospective was to christen the project. So, we sat there brooding like future parents and tried to find a name that sounded both modern and interesting, with all the necessary seriousness and most of all, that had a suitable metaphorical meaning.
After many ideas, based on "Kubernetes" (which is derived from the Greek word "helmsman"), we looked for Greek words that had something to do with branches, forks, versions and similar terms. None of them really hit the nail on the head and when creativity slowly came to an end, one of the team members had the idea to name the project "Tzatziki".
To what extent creativity was at a record high, or completely absent, and whether our approaching lunch break had anything to do with our flash of inspiration, still remains an open question at this point.
We accepted the naming this way (spoiler: the name didn’t keep) and we got to work and created tickets from which we would get to know both joy and hate from a completely new perspective during the following months.
Before developing the actual application, we first had to set up a Kubernetes cluster.
It was clear to us at a relatively early stage that the effort required to operate this cluster would be relatively high and that it would therefore be a solution that would be replaced, for example, in the long term by a hosted cluster. We approached this matter with a corresponding attitude. It had to function, but it did not need to be perfect. Security is a feature and not a prerequisite.
With this mentality, we could relax and ignore a whole range of problems, such as access control, permissions or the distribution of nodes across several hardware servers. We were therefore able to take care of the essentials first.
The installation of a basic Kubernetes cluster was surprisingly very simple. One can choose from a number of possibilities; we decided to use the tool kubeadm. After one has updated some basic settings on the servers (e.g. deactivate swap, install kubeadm and kubelet), one runs kubeadm init on the future primary node and waits for the output.
Practically, after a successful installation, the command that one must execute on the future replica node is issued directly, so that everything is installed, and the cluster is joined. In our first setup, we practiced carefully and only set up a cluster of two nodes (which later became six).
Then we had to install some configurations (a "pod network", for example) so that the entities could communicate with each other and then we were ready to deploy Docker containers.
Joy! ...or? Not quite. In order that we could work at least halfway concretely with the cluster, we had to solve two problems and install features in Kubernetes. We had reached a point where we could deploy software, but there was no possibility to reach it from outside or to gather data for a long time, both of which were two requirements for our new application.
There are ready made solutions for both problems in Kubernetes that can be installed "quite simply" ("Persistent Volumes" and "Ingresses" with respective "Controllers"). Therefore, in this text, we will avoid recounting these concrete stumbling blocks and save ourselves from reliving these memories, but the 5 working days of logged time on the corresponding tickets clearly indicate that we struggled significantly to understand this process and to set things up correctly.
And here is a tip for everyone who wants to try it out for themselves: keep a journal of what you did. During the first months, we had to completely delete the cluster 5 times and set it up again. If we hadn't kept a log of what we did and had simply stored the configuration in a git repository, we would have spent a lot more time on it.
Then, when it came to programing the new application, we asked ourselves when thinking back to the Retrospective in December questions like: What are our goals? What problem should the new software solve for us? Who are we writing this software for and how should it be used?
In addition to the entrepreneurial ambitions that drove and motivated us to produce as "hip" a piece of software as possible, we first had to return to the facts and define some realistic goals.
The underlying problem was productivity and the process of changing our workflow to a more intensive use of branches during development. We wanted to make it possible to start a development version of a software without detailed technical knowledge and special tools.
And we also wanted to solve the problem that we only have a certain number of test systems and yet want any number of test systems. And maybe these two aspects are the same thing.
For simplicity's sake, we set ourselves the goal of using our software to make launching an application a one-click child's game, even for non-technical project participants in most cases. However, the prerequisite for this is that a developer has to create settings in advance that are relevant to the execution of the project.
We also wanted to focus on making the application as simple as possible. In doing so, we wanted to avoid binding ourselves to certain APIs and versions of Kubernetes or having to teach Tzatziki special file formats. Tzatziki should rather act as a middleman with whose help all features of Kubernetes can be used.
In order to achieve this relatively simple application, we decided to simply use the native Kubernetes .yaml files to configure a project in Tzatziki. In other words, a developer defines in a .yaml template, how the software can be executed in Kubernetes and any other user then only has to press a button to get a version of this software belonging to the same branch to run.
Tzatziki then only executes the pre-programmed commands of the user, without even having to know details about the software it starts.
Now, I have often used the word "project" in the past paragraphs. Our new program is supposed to manage "projects". In our original use case, it was Sophora Web.
Our creativity did not stop at the naming of our new program and we made a first sketch of the tight requirements (as the file name Scribble-pro-meisterwerk.png already reveals).
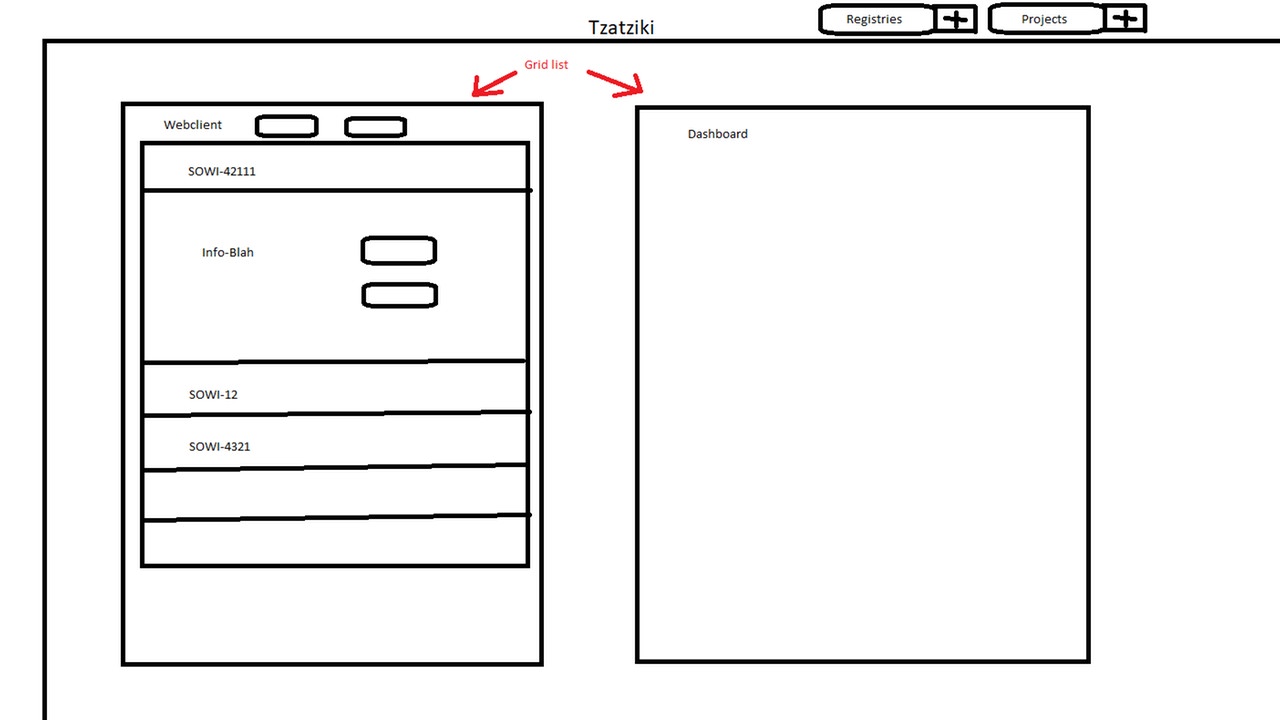
What you see here is exactly the following: a menu bar at the top with the buttons "Registries" and "Projects" as well as a view with two boxes, each representing a project. In the one project box, there are further boxes and buttons. The additional boxes visualize versions of the respective project, which can be started or stopped.
Now, the terms branch and version have been used several times. Tzatziki would have to know Git to know which branches are available and then find the right Docker image for each branch. This contradicts our goal to make tzatziki a simple application and therefore we came up with a pragmatic solution.
The Docker images are already created automatically and tagged with the name of the branch. So, there is one tag for each branch. Tzatziki lists the tags that exist for a Docker Image and these can then be started. In the long run, this leads to a gigantic list of tags that exist for a Docker image, but first of all, this isn’t bad and secondly, it can be fixed by cleaning up the Docker registry.
Basically, different .yaml files are combined under one project, which are then transported together into the cluster.
These files are templates that Tzatziki then fills with the correct variables at runtime. First of all, the tag of the Docker image is important, because it differs from version to version. Templating also makes other nice features possible, such as overwriting and adapting configurations for individual versions.
Therefore, a branch, in which a new feature that requires a new configuration, can be executed quite simply with a few adjustments to the corresponding project version within Tzatziki.
When we started with Tzatziki, Spring Boot 2 was relatively fresh, and the reactive approach was the hip thing that we wanted to try out. So, the first version of Tzatziki was based on the following technology modules:
In retrospect, working with Spring Boot 2 was a huge undertaking, because we had to go through the Reactive Web approach completely and not only had to rethink a lot of things, as many things didn't work as they did previously. That led to some headaches in the beginning. We chose Angular because we already implemented other projects with it (e.g. Sophora Web).
Fast forward to today, and we have, of course, made some technological progress and we now use at least Java 11 and Angular 8.
After working on the project for over six months, we had a first working version of the software.
The functionality was quite expandable, and the stability was at most at two nines (https://uptime.is/99), but we were able to solve our original problem with relative clarity.
However, Tzatziki still needed a lot of manual support and had not yet reached the end of its development.
Meanwhile, we liked the idea of making the project open source, as we were sure that the project could solve other people's problems as well. The inspiration for this probably came from our visit at the Container Days 2018 in Hamburg, where we were introduced to a similar mindset by numerous lectures and insights. Our team leaders were of the same opinion, independent of the open source idea.
We were therefore confronted with a new old problem, the name. There were reservations as to whether the name for a Greek yogurt, garlic, and cucumber sauce was a suitable name for software. All right.
After another long back and forth we came up with a new name: O-Neko: "O-ha, what kind of name is that?"
Neko is the Japanese word for "cat" and in Japanese "O-" is placed before words if you want to emphasize something.
And since cats are a great internet phenomenon and the name was at least not worse than Tzatziki, we even managed to clear the approval process with our bosses.
The renaming was followed by a series of re-designs of our user interface. In the following chapter are some screenshots of Tzatziki/O-Neko, where you can see how the project has developed over time.
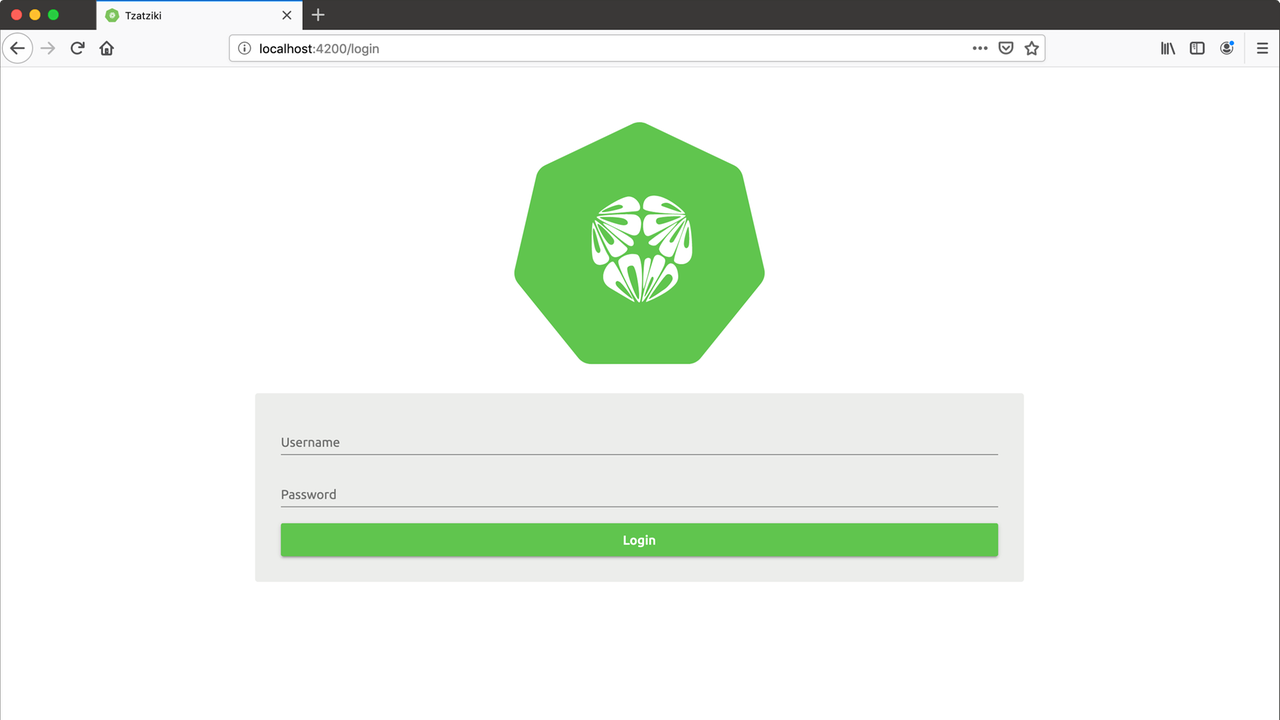
Let’s begin with our very first presentable version. In the first picture below, you see our first login screen. Just like the Kubernetes logo and the cucumber salad, we decided to use a cross section of a cucumber as our logo. No, this should not be a brain (as I said - Tzatziki should be simple and not omniscient).
After logging in, you are greeted by the following screen. In this state, the project administration only takes place via the home page. Docker registries, from which the projects are obtained, as well as users, have their own sub-item in the menu. On the right, an activity log shows what is going on in Tzatziki.
At this point, it should be mentioned that the picture is not quite complete. Inside the "Sophora MobileClient" (former name of Sophora Web) tile you could still see some fold-out submenus, which follow the example of the sketch above. However, when creating the screenshots for this article, it was noticed that the connection to the Docker registries no longer works in the old version. Therefore, a complete screenshot would not have been available without considerable effort.
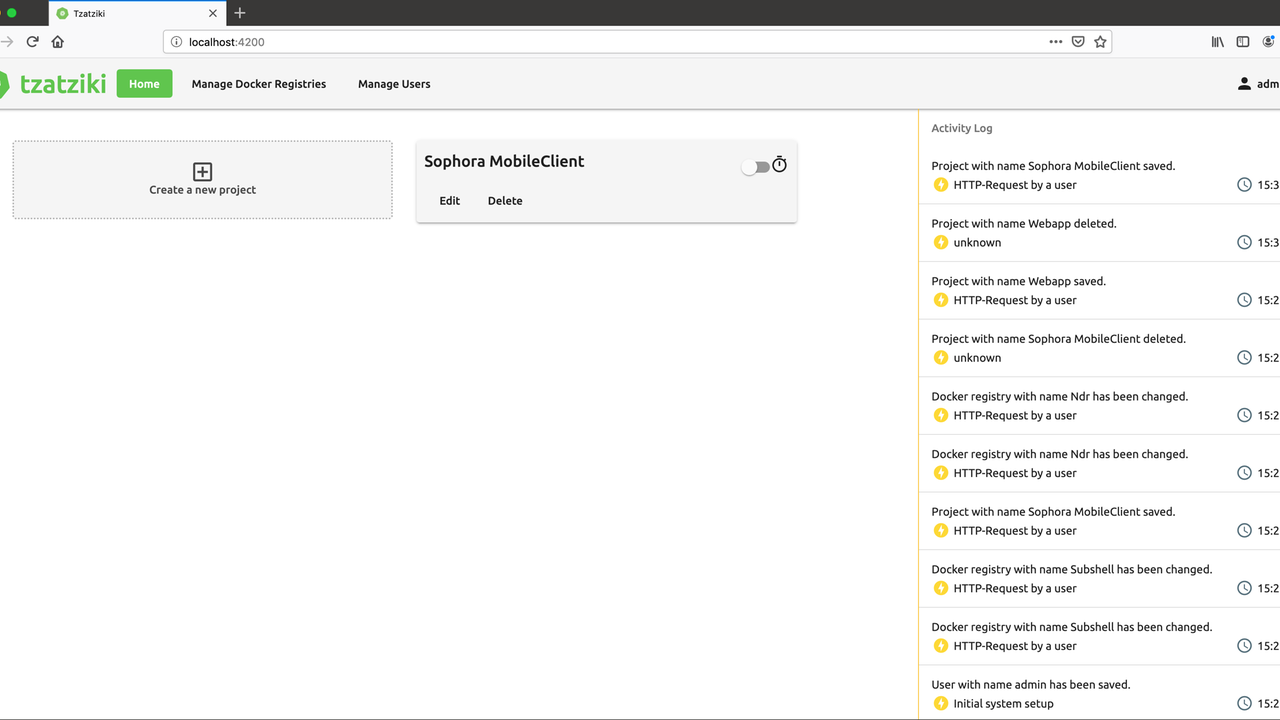
A few months later, we were able to develop an improved version of the dashboard.
On the home page you can see the currently running instances of a software (in the example below, an instance of Sophora Web is running). If the software provides a callable web interface, this can be opened directly via the link symbol in the line.
Re-deploy and stop buttons make it possible to restart or permanently stop the instance. The Activity Log is now hidden behind the button on the right.
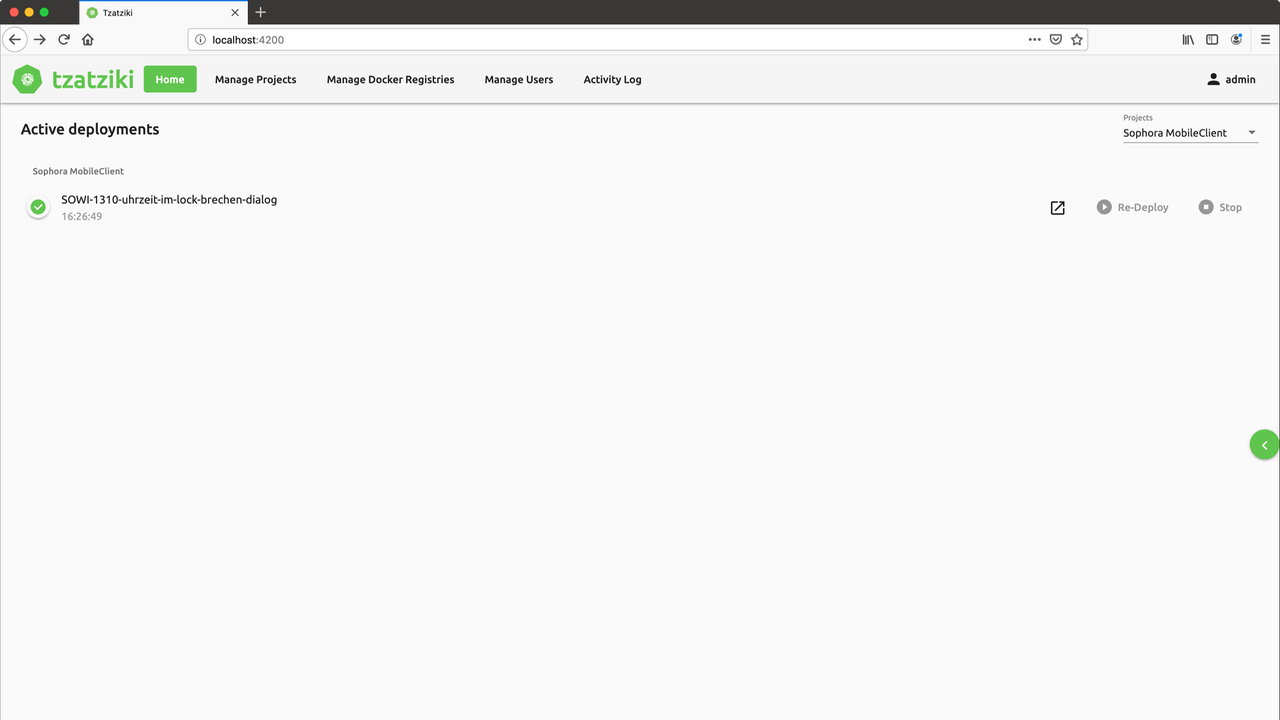
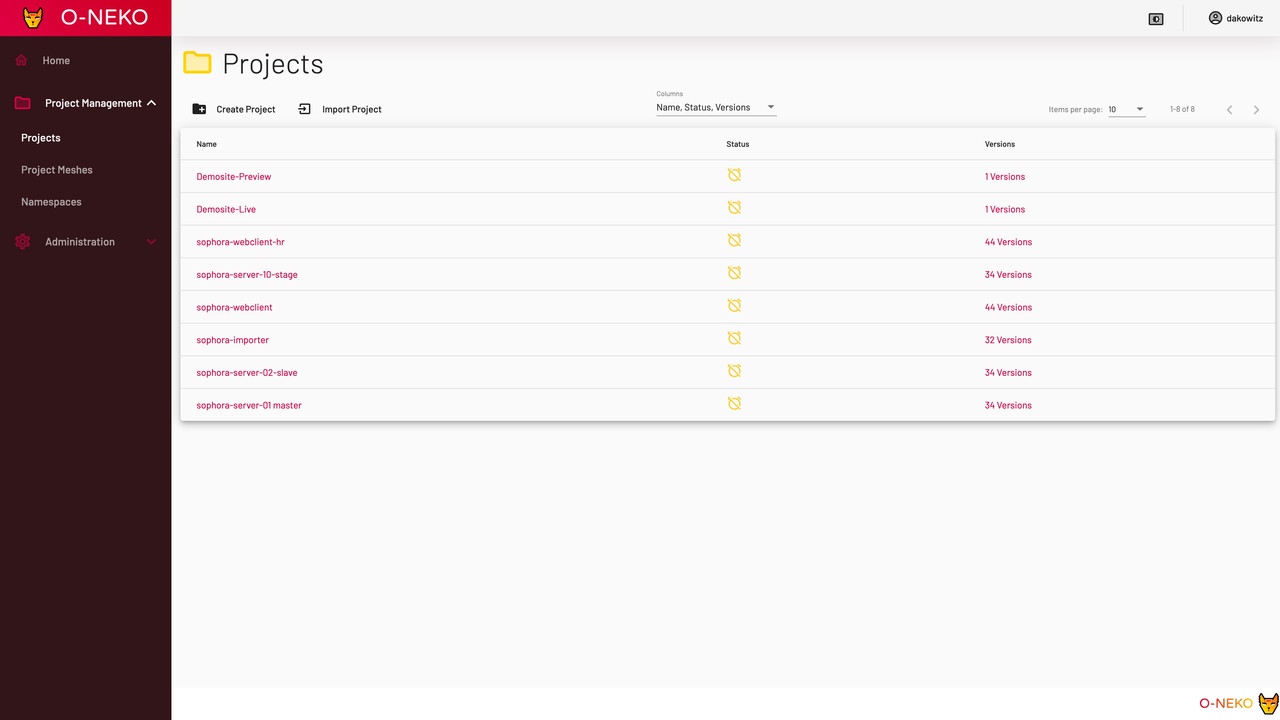
Instead, the project management has been moved to its own window. Here projects can be created and edited. In addition, you get a complete list of the versions of a software (here 519!), which you could start with one click (which one can do even if you don't know anything about technology).
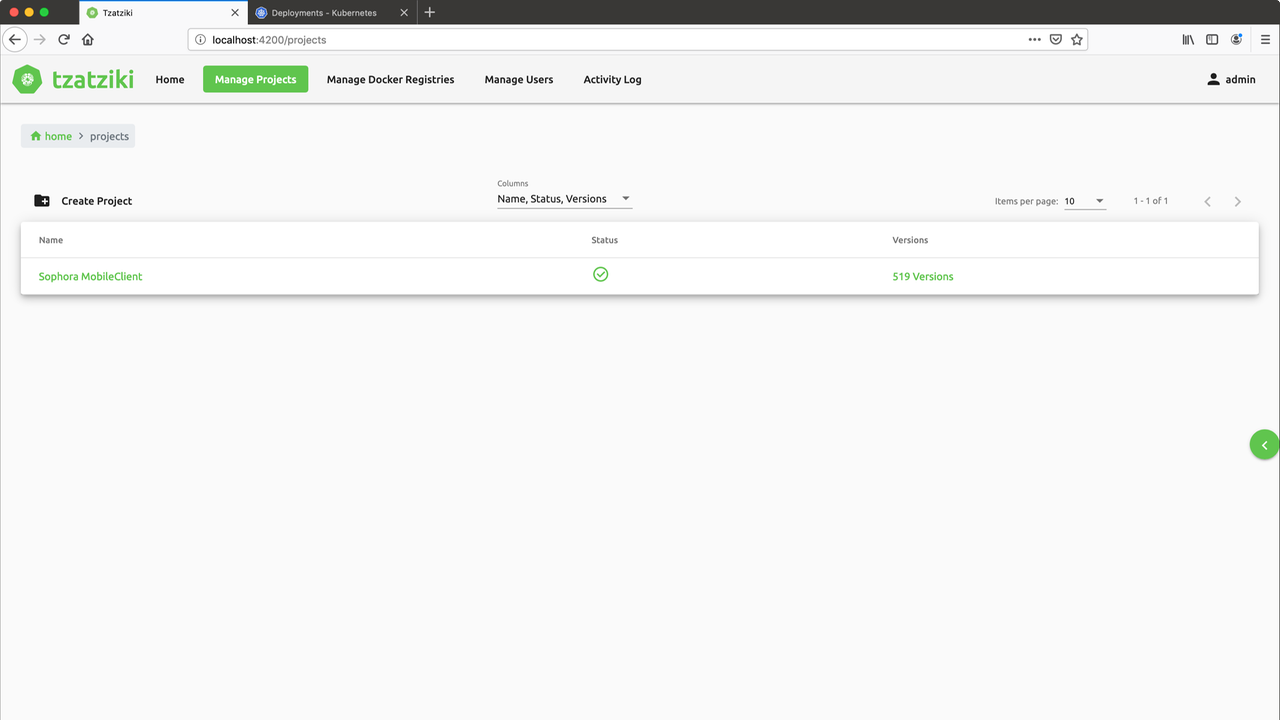
At this point we have now arrived at the end of Tzatziki. The first O-Neko design follows. The layout is similar, the colors and the logo are completely different.
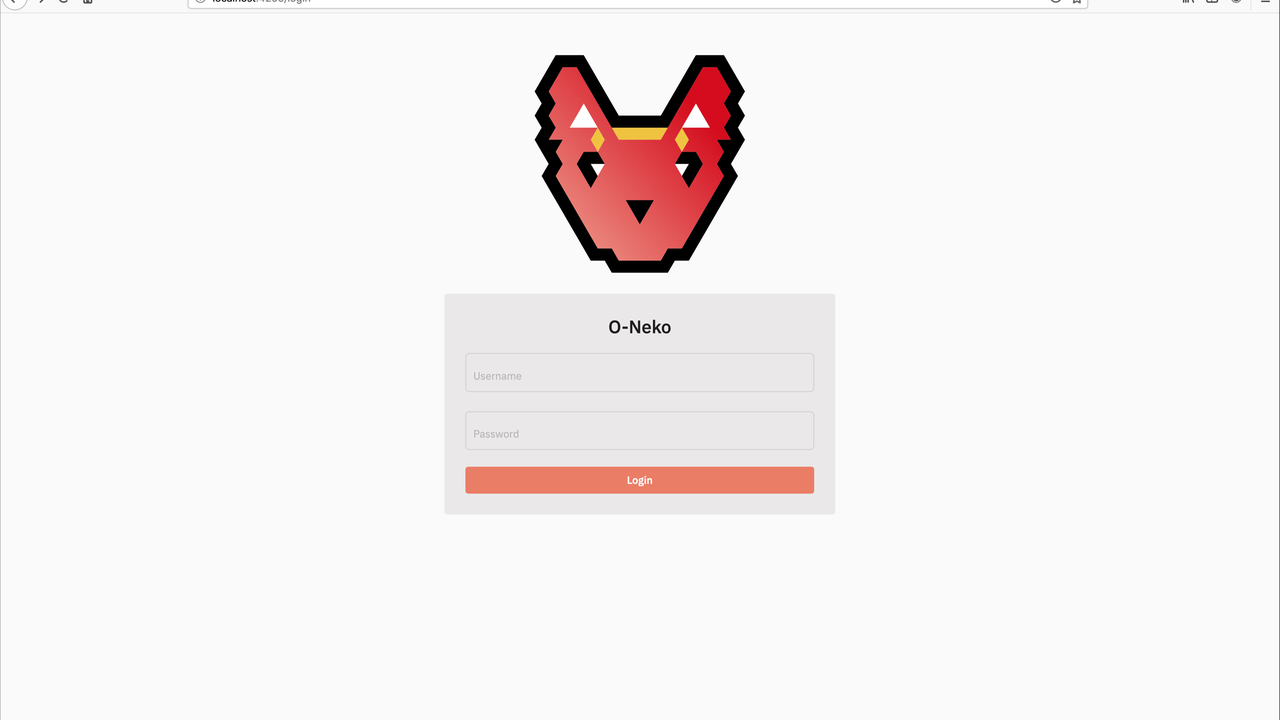
But this first O-Neko design did not convince us all yet. The logo didn't look like a cat and the colors only looked appealing in the first 5 minutes. Without further ado, we created the (so far) final redesign.
The following screenshots show the latest version of O-Neko.
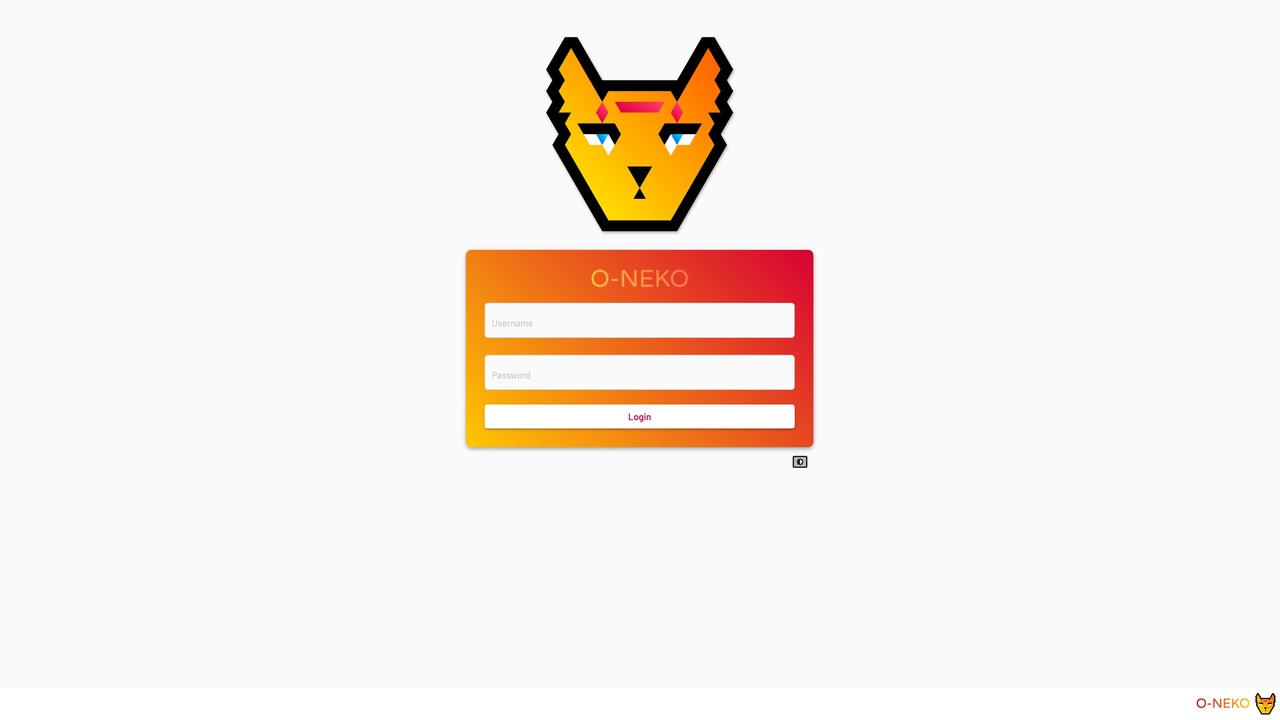
The login screen now looks a bit more cheerful (at least in color).
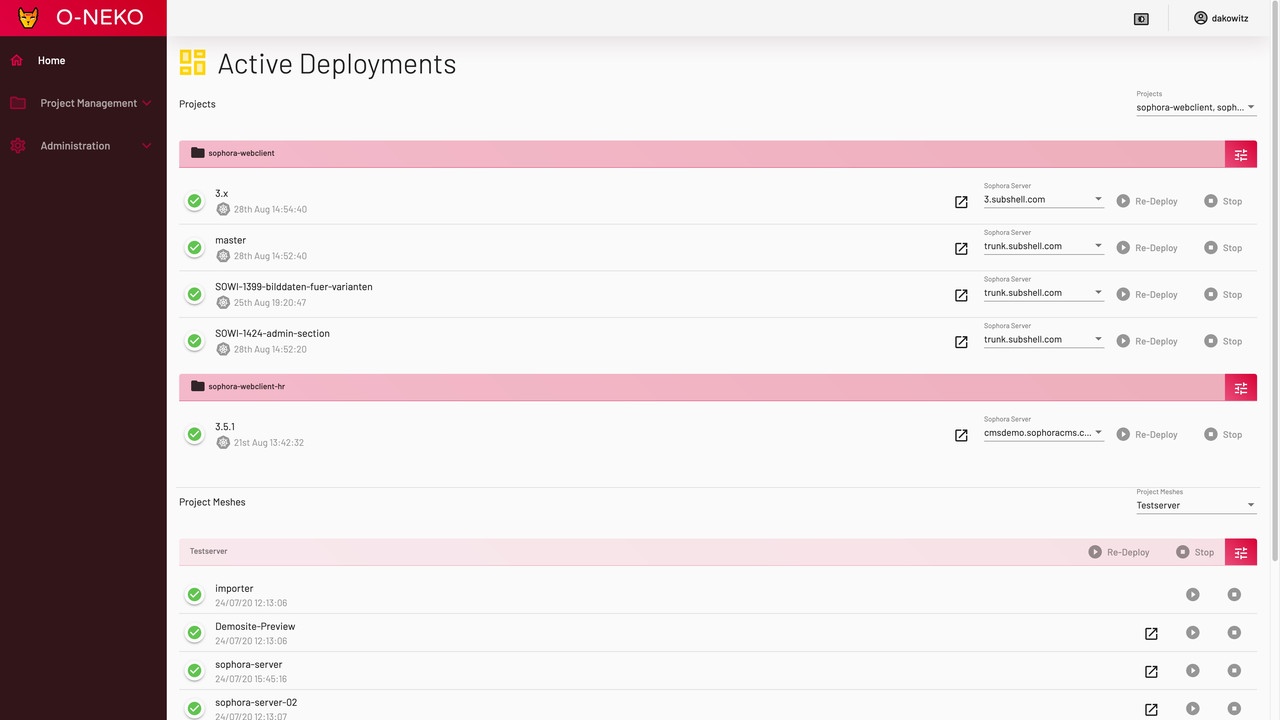
The list of active deployments is now also a bit clearer, as it is color-coded.
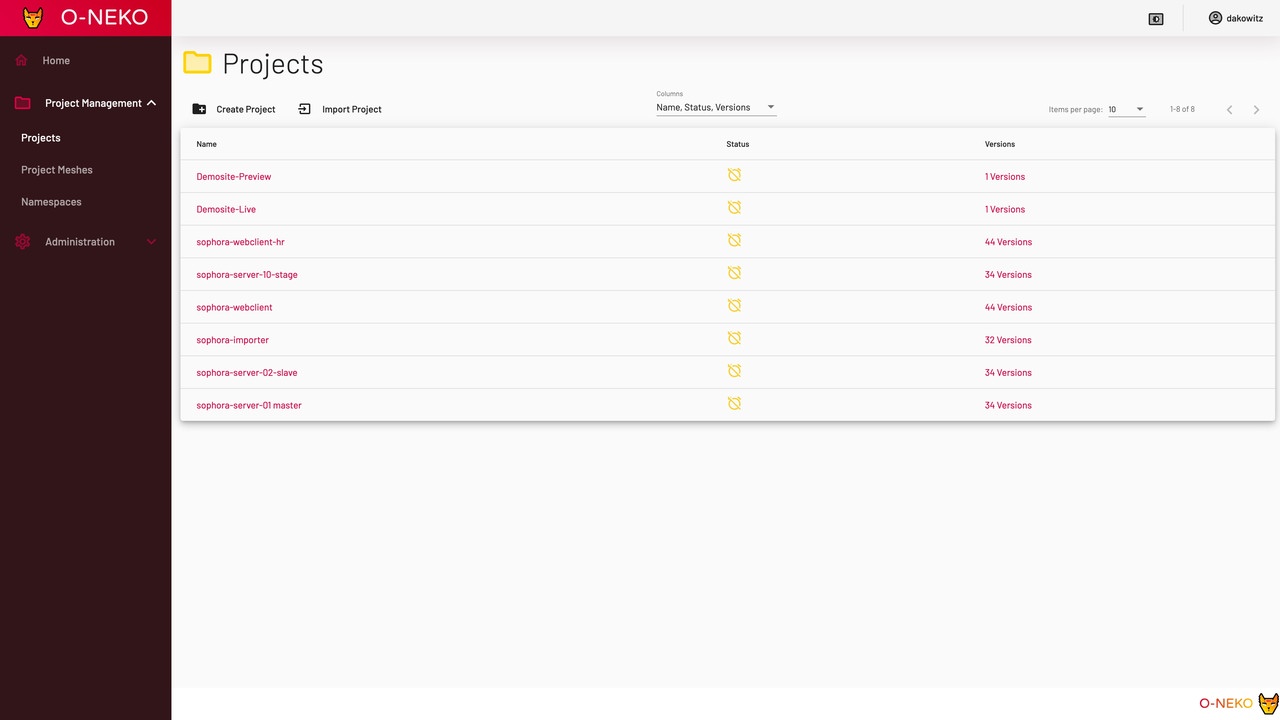
Since the Tzatziki days, the project view only had to follow the color changes.
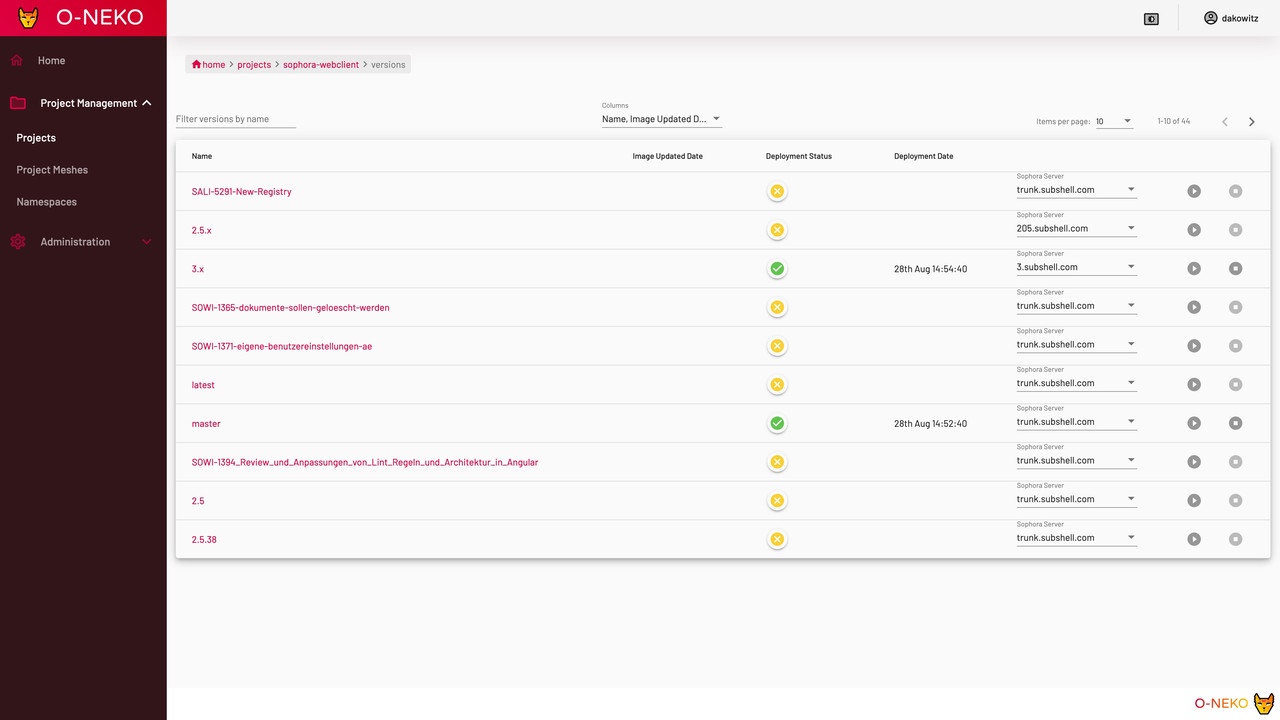
The following picture shows the list of all versions of Sophora Web that we have in our Docker Registry.
In its current state, O-Neko helps us with our daily work and not only makes it easier for our project managers to preview our work-in-progress, but also allows our testers to launch certain versions of software for testing purposes.
Thanks to O-Neko, the project and product management team can look at development statuses much earlier and give feedback. That is really good for product development. O-Neko has become indispensable for us.— Nils Hergert, subshell, Member of the Executive Board
The functionality of O-Neko includes the creation of "projects" defined by a Docker image and a set of Kubernetes.yaml files. The .yaml are provided with template variables, which are filled in by O-Neko when a version is to be deployed into the Kubernetes cluster.
The versions of a project are determined exclusively by the tags that are available for the respective Docker image. A connection to Git is therefore not necessary or even available.
Besides templates, further settings can be made for a project. For example, you can determine whether new tags for the image should be started automatically, whether new versions of a tag should be updated automatically, and how long a version of the project should be active before it is shut down automatically (or whether it should be active for all eternity).
The settings of a version can be completely overwritten and extended, so that even complicated new developments in a branch do not have to do without O-Neko.
Projects can be obtained from any Docker registry. Therefore, it’s not a problem if multiple registries are relevant. You can dynamically determine which registries are available in the frontend.
Active deployments are comfortably displayed on the start page and are provided with links to the web interfaces of the respective programs, if they provide an interface.
A user administration with a simple role system can be used to determine who can modify projects or only see and start them.
Mainly we continue to use O-Neko for Sophora Web as well as for other Team Weasel internal projects.
The other teams at subshell have not yet dared to use the tool. Too bad, we think, but we will wait for the others to come around!
But O-Neko continues to remain exciting. We already have more incredibly practical features in the pipeline and visions for the project of how it might work in the future.
This feature should allow you to select several projects within O-Neko and deploy them together in specific versions.
For example, this would make it possible to set up a complete test environment, e.g. in our case test environments for all Sophora major versions and execute all necessary components like servers (Primary, Replica, Delivery), tools (Importer, Exporter, Sophora Web, Dashboard, UGC, Teletext etc.) and playout.
In the long run, this could replace our static test setup (one VM per major version, managed with Ansible).
Smaller setups are also possible, e.g. if you want to test the interaction of two programs in certain versions during development.
At the moment variables can be defined and replaced in the template as well as overwritten in the different versions. However, this is relatively uncomfortable if, for example, there is a variable that can assume certain fixed values and that you change frequently.
An example can be made with the playout of a Sophora web page. The playout always connects against a Sophora server to retrieve the data. Typically, in an installation, there are test and production environments, between which you want to be able to switch the playout back and forth, e.g. because you are developing a new feature in the test environment.
A selection variable with the URLs to the Sophora servers in the respective environments can simplify this configuration and prevent errors. This variable will be visible not only in the configuration view, but also on the dashboard, so that the variables can be adjusted very quickly.
In the near future, we plan to improve the construction sites which, from the developer's point of view, cause the greatest difficulties in O-Neko and which are solved in a suboptimal fashion from a technical point of view.
On the one hand, O-Neko is currently a monolithic application. That's not bad because the application isn't big, but we see many advantages in dividing O-Neko into several microservices.
To explain this better, we have to make a small excursion to O-Neko's engine room.
O-Neko consists of several independent parts within the monolith.
A part that takes care of the communication with the frontend and passes out the data.
A part that deals with querying the Docker registries. This part determines whether new versions have been found for the projects or whether existing versions have been updated. It also detects if versions have been deleted, and then O-Neko also deletes the respective version. This is ultimately about synchronizing the information between O-Neko and the Docker registry.
A part that takes over the communication with the Kubernetes cluster. If a user clicks on "Deploy", the templates for the project are filled with the correct variables. Then a namespace is created in Kubernetes, whose name is a mixture of project name and version name. In this namespace, all templates defined in the project are rolled out. This namespace is deleted when a version is shut down. In addition, this part of O-Neko continuously monitors the running applications so that the status can be conveniently viewed in the web interface.
Each of the three key points could be turned into an independent microservice.
This would have the advantage that, for example, you would no longer have to program everything in Java. We all think Java is great, but there are better alternatives for communication with Docker or Kubernetes, for example in Go.
This would also ensure that O-Neko would have no problems with the user interface (and the other way around) if it had problems with Kubernetes and Docker.
However, this fundamental reorientation will take a lot of time and effort and will be a long time coming (we haven't started yet and there's no plan for when that will happen). At least a part of the previous list will have to be done before then, namely the deployment in own namespaces.
We have concrete reasons for creating namespaces for each version, but we realize that this is not the best way to work with the tool. We may have to address this issue before we go further with O-Neko.
In addition, there is of course still room to release O-Neko as an open source project.
Basically, we have concrete plans for this, but it is not enough to upload a project to GitHub.
We'll face the challenge of rewriting READMEs and documentation so that they can be understood by outsiders, we won't be able to build the project on our internal Jenkins anymore, we'll have to switch to an external CI vendor, and we'll also have a lot of other administrative tasks to do, such as thinking about how we want to get releases of O-Neko noticed.
Now that you've read so many pages of text, the question is for certain, how can I try O-Neko? O-Neko is only available as Docker image, which we provide HERE. With THIS Kubernetes configuration O-Neko can be deployed into a cluster and runs completely. It is important that the service account for O-Neko has the rights to create and remove namespaces, otherwise it cannot work correctly. The document AVAILABLE AT THIS LINK then explains the first steps to set up a project in O-Neko.
In the previous article, we have presented O-Neko. O-Neko is a software that runs within Kubernetes and which makes it possible to deploy development states of software based on Docker images in the cluster.
The focus is on simplicity: O-Neko should build a bridge between developers and non-technical project participants such as project managers. The latter should also be able to start and test development versions without technical background knowledge.
Upcoming Features:
We hope to have provide you with a comprehensive overview and an intriguing introduction to our new project O-Neko and that we have clearly explained our motives which drove us to create this project.
O-Neko should distinguish itself from similar tools through its simplicity and should offer a platform for non-technical project participants to be able to access development states of software in the blink of an eye, without having to go through the developers or to install development tools.
If you have any questions or comments about our project, please feel free to contact us at team-weasel@subshell.com.
